_verify" content="bbb841dd5e0db345e51757e59e8d03cb"/>

Saturday, June 29, 2013

Money Center Freebie

Getting kids to recognize coins (both heads and tails) can sometimes be difficult. Here is a center I made that is free to you just because you found my blog and as a thank you.

This center can be used 2 different ways (I included student directions for either way you decided to play it).
1). Play with a parnter as a memory game matching the coin image with it's value.
2). Play it independently by matching the cards.

I did make this black and white. If you are a teacher in a classroom, I would suggest running one set on red paper, then run another set on yellow paper, one set on green paper, etc. That way if they do it independently or you need 2 sets, the pieces don't get mixed up and then they get confused. :) I loved having different sets on different colors! Time saver!!!!
Click on this link and it will take you to "Dropbox" where you can download it for free.

FYI- Clipart and frames were by My Cute Graphics. I stumbled across her website and she has tons of cute FREE clipart for teachers to use. I'm all about sharing information. If you like my stuff please "pin" it on Pinterest or share my blog address. Thanks!


Oregon Trail - Letter O

I know this is NOT the normal type of Letter O Unit you would typically do with the preschool/kindergarten age kid. But my 5 year old (who starts Kinder in the fall) somehow got on a pioneer kick. He kept asking lots of questions about wagons, wagon trains, pioneers, etc. So I ended up making a little unit for me to do with my boys. Here it is. I normally sell these on TPT or TN, but if you are here checking out my blog, you get it for FREE. Click on the link and it will take you to "dropbox" to download. Enjoy!! Click  here for the link to dropbox. :)


One thing that I used with my boys when I taught them about the Oregon Trail was that I made a powerpoint of different pictures and maps. Oregon Trail Powerpoint This was so they could see real pictures, maps, the ruts the wheels made, and overall get a feel of the journey.

I also read my boys the book Pioneer Cat by William Hooks to go along with this unit. Then since I was at it, I went ahead and made a Guided Reading unit and lessons that could be used when I go back to teaching. This book could be used with higher 1st, 2nd grade, or lower 3rd graders.


Pioneer Cat Guided Reading Lessons

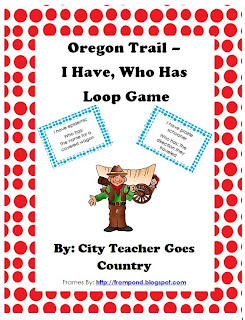
Since I was on an Oregon Trail kick, I ended up making a loop game or "I Have, Who Has" game which is good for reviewing facts and vocabulary. Loop Game.


****I found another FREEBIE online (click here). This is a board game that has cards that children answer questions they learned. This game can be played as a review.  *****

4th of July

Yesterday, I took the boys and spent it at their Grandparents House (aka Bumpa and BeePa - my boys made up their own names for their grandparents).
Since it was so scorching hot, we tried to come up with things to do inside. #1 on the list was playdough. #2 was crafts. To get in the spirit of the 4th of July we made rockets and flags.

Since my boys LOVE to cut, I figured where else to make a mess, but at grandma's. :) So I let them loose with scissors and paper. Since we had a million tiny bits of paper we glued/collaged them on a toilet paper tube. Then I added gift wrap ribbon as streamers to the bottom and then hot glued a top to make it look like a rocket. I thought they would be a decoration. NOPE, the boys began using them as rockets and throwing them across the house... which actually worked pretty well.


Happy 4th!!

Tuesday, June 25, 2013

Homemade Laundry Detergent

I will be the first to tell you that I AM NOT one of those "granola", "crunchy", "Birkenstock", kind of moms.
But since I have quit teaching to stay home with my boys there are a few things I have given up. For example, when we were building our house these was a list of a million "dream home" things I wanted. But that would mean I would have to continue working. So, our house is less than fancy and I get to spend years home with my babies.

Couponing was one thing I picked up to save money. The other was a HUGE stretch for me.... I've been making my own laundry detergent. Seriously, when I told my sister this she about had a conniption. You'd think I quit shaving my underarms or something! (No, I still shave!)

Now it has been 2 years since I last bought laundry detergent. In the past 2 years I have spent $10.50 on the detergent supplies and $7.00 on the container.

Supplies: 1 box of borax, 1 box of Arm and Hammer Washing Soda, and 1 bar of Fels-Naptha, and a 5 gallon bucket.
(Yes, I had to ask my mom what Fels-Naptha is). It is a bar of soap (97¢ at walmart-Look on the lower shelf in the laundry soap aisle).


Directions: Cut the bar of soap into thirds. This bar of soap is the only thing I have had to re-buy in the 2 years so far. (So $2)
1. Shred the 1/3 bar of soap using a cheese grater. This is the most time consuming part. 
2. Put your grated soap into a BIG pot with 6 cups of water and heat on low til soap melts. Don't let it boil.
3. Then add 1/2 cup of washing soda and 1/2 cup of borax. Stir until dissolved.
4. Stir until it thickens. Depending on the weather it may thicken more or less than other days.
5. Into a 5 gallon bucket -  Add 1 gallon of warm water. Add your soap mixture from the stove, and then another 11 cups of water.
6. Stir and let it sit overnight in the big 5 gallon bucket with a lid.

This is what it looks like the next day. There is a huge thick layer of the soapy stuff on top and the water underneath.
Here is the other time consuming part.
1. Get your hand mixer or submersible blender. Go at it and mix it up really well.
2. Funnel it into your container. 

Side note: After it sits awhile in your container it will begin to separate again. Before each time I dispense it, I pick up the container and give it a good shake. (This can count as your arm workout).

****I used 1/2 cup of detergent per load. *****


Sunday, June 23, 2013

If You Give A _____ A ______

I just LOVE the series of books by Laura Numeroff. I had a few of them in my classroom library. Then my mom (who is a former teacher) began to snag any she could find when Kohl's had them as a promotion and then also at Half Price Books. So now I have the whole set. Yippee!!

If you are not familiar with them, let me give you an example. If you Give A Pig a Pancake, they will want syrup. The syrup will make them sticky and they will want a bath. In the bath they will want a rubber ducky....etc. So it goes on and on. Pretty much like the way MY brain works. My real life example: I have people coming over and need to clean the bathroom. In the bathroom I clean the pee on the floor (I have boys) and  I see dirty baseboards, so I get out the paint....See, I guess the author's characters have ADD like the ADD I get when cleaning. :)

Anyway, I pulled out these books and began creating a unit for one. Then that meant I created a unit for another one. Oh, the vicious cycle!!


Each unit has worksheets and centers included. They also have centers I left blank so you can easily fill them in for any subject you are working on at that time. Check it out either at TPT or TN.

Friday, June 21, 2013

Knights and Castles - Letter C

My older son was on a knights and castles kick for awhile. Once again, finding anything to keep him interested online was not available. So I created my own unit for him and the younger one.

Each lesson I make, I add a list of everything that is included and can be taught. This one I even introduced the "kn" sound to him and we discussed the "k" being silent. For the younger one we did the letter C.
So each unit has a little bit of variety on the level of skills. There is a big range between a 3 year old and a 5 year old. :)

Letter M - Magnets

Magnets. What is more fun than magnets for kids?

I made this great unit for my boys. They had a lot of fun doing this one. Since I have been doing these lessons, my 3 year old now understands greater than and less than. He even knows which way to turn the little math signs too, not just the concept. I'm amazed. Check out my thematic unit!

Monocot and Dicots

Monocots and Dicots

What in the world??? You may be asking this.
Monocot and Dicots - These are two different "kinds" of plants.

I taught in a Texas public school for 9 years.Texas does not follow the "common core" standards. Yes, like most Texans we like to do things our own way. In Texas we have the TEKS (Texas Essential of Knowledge and Skills). From everything I have read, they are pretty much the same. There are minor differences here and there.
Well, in the 3rd grade TEKS 10b - "Explore that some characteristics of organisms are inherited such as the number of limbs on an animal or flower color and recognize that some behaviors are learned in response to living in a certain environment such as animals using tools to get food". There it is for ya!
Anyway- my district took this to another level and had us teach monocot and dicot plants. In trying to find lessons to teach this...after first learning it myself...I realized there is not much to this topic. So I created a few things to help out my fellow science teachers.

 
Monocot and Dicot Board Game  (click here for the game)
 A Monocot and Dicot Board Game - You can use as a science center. I loved throwing in science centers during my literacy centers to help review and to continue to spiral the curriculum.

A Monocot and Dicot Memory Game- It has lots of pictures to help them remember facts to distinguish between the two.

Monocot vs Dicot powerpoint (click here for link)
Plus a monocot and dicot powerpoint. This will help the teacher (refresh your memory) and teach the class the difference between the two kinds of plants.
I hope you find these things helpful.

Letter Q - Quarters


Letter Q- Quarters

This week I pulled out the Letter Q (Quarters Thematic Unit). We have had a bunch going on so it has been about a week since we have done "mommy preschool". They were so excited...or maybe it was because we were talking about money. Plus quarters is more fun than quilt or queen.


I began the unit talking about quarters, showing the different ones, blah, blah, blah. All that introductory stuff.
My 5 year old looked at my stack of papers and pulled out the letter Q and ? sheet you see below. He wanted to do those. I told them that was a special "after nap" art project. So while little one slept, I taught him about question marks. He did knew that they were "mystery marks". That was thanks again to some tv show. So who said tv was bad??

So after 3 yr old woke up and then a quick dip in the pool (hey, it was already 90 degrees here) it was art project time. I got out the watercolor paint and Q-tips (see letter Q tied in). The youngest got to q-tip paint the letter Q and the older got the "Q"uestion Mark. Notice their two different ways of painting.

They LOVED it!! I guess I am a bad mommy because they acted like they had never seen paint before. Ok, so maybe it has been so long ago, that their little brains just don't remember it. They did those pages. Then they asked for more. So I printed the quarter coloring pages out from the unit. This kept them busy as I began dinner. Then they came in begging for more. Since, I was low on ink and didn't want to mess with changing an ink cartridge, they got pages out of a coloring book and I got to finish making dinner in peace.

Letter G - Goldilocks and the Three Bears


Letter G - Goldilocks and the Three Bears

Do you need a unit about fairy tales?? Try out this cute one. I included an easy reader book. I made this unit using clipart from www.scrapindoodles.com. I just love her work!! I plan to make more fairy tales. Also if you have any suggestions on units, please let me know, I'd love any suggestions! www.cityteachergoescountry@hotmail.com.


Thursday, June 20, 2013

Letter R - Coral REEF Thematic Unit

When I make Thematic Units I try to find things that are a little different. So far this unit is my largest one at 47 pages. It has all the basics of my preschool & kindergarten units.
This one I tied in a bit of Australia stuff  (since the Great Barrier Reef is by Australia). We did some aboriginal art, learning about coral with a science experiment, and just had fun. Check it out.


My kids really enjoyed this one. Now they want to go to Australia too. Maybe we can all convince their father. :)

Thursday, June 13, 2013

Legos - Birthday Ideas and Preschool & Kinder Thematic Unit (Letter L)

My 5 year old was CRAZY about Legos. So we had a Lego themed party. After many hours of scanning the internet I created a fun party for him.

Pin the Lego game (this was store bought at Party City)
Goodie Bags: Lego circles glued on the front of the cheap walmart solid colored bags.


Lego man crayons - I bought the mold online, but if you have a Lego store close to you, they carry them in the stores. I found this out later after paying shipping. :) Then melt old crayons to make party crayons.

Lego coloring book - I printed some coloring pages from the lego website. Lego website for coloring pages. Then found other black and white images online to put inside as pages. I did this "old school" way. I copied and pasted the images to the size I needed then ran them through a copier and stapled them inside a piece of cardstock I used for the cover.


Lego Candy- I bought those candies at a candy store in the mall where you can go and scoop out candy from their bins. Then you pay for it by weight. They were a cute addition, but they are expensive and actually very hard to eat. My boys didn't like them and we ended up throwing them away. FYI.

Estimation Jar- See, the teacher in me never is very far away. :)
Quick shout out to The 3am Teacher I love her stuff. This frame is one of her works.
I made a pennant to hang for decorations along with a Lego board with the number 5 in Legos.
Prize Bucket- I had envelopes that contained stickers, tattoos, or even $1 in them.

The Lego cake- I found directions online from Betty Crocker. Lego Cake directions.  
If you are NOT a cake making person, don't worry. This is very easy to do, it is just time consuming to put icing around all the marshmallows (lego dots). Plus my perfectionism was kicking in while making the cake, so it took me a long time until I was satisfied with my work.

I made a Lego bingo game to play. I basically googled "lego people" images and copied and pasted them into a chart. There is also a "lego" font that I downloaded for free too. I used that for the bingo game heading and also for the cover of my coloring book.

A bean bag toss. Yes, even the bean bags were Lego themed. I make squares of felt pockets, stuffed them with beans and then hot glued the lego dots to the top. Then I got 4 bowls from walmart and stuck points on each bowl. Tadaaaa, a game!!


Homemade pinata - I found the instructions from Infarrantly Creative Blog . But I tweaked them to make a square. I ended up putting another brown paper bag upside down to make it flat on both the top and bottom with the hanger poking through. Then I hot glued kid yogurt cups on the front and put crepe paper around them. Super cheap!!!


Lego spoon race - easy enough!
 Presents - I found Lego wrapping paper at Party City. Or I also made my own with solid colored paper and then adding the dots. Let me tell you, those little 3D dots that are used in scrapbooking or cardmaking are perfect for all these Lego dots!!